Zapier Documentation - Retrieve Applicant Data
This article reviews how to set up a trigger inside Zapier to retrieve your applicants data and send that data to your desired software. Below is a video followed by a step by step process. The example given is sending an email alert to myself when a credit report is processed, however you can do thousands of workflows with Zapier!
Step 1: Configuring iSoftpull
 Select iSoftpull as the App
 Select Retrieve Applicant Data
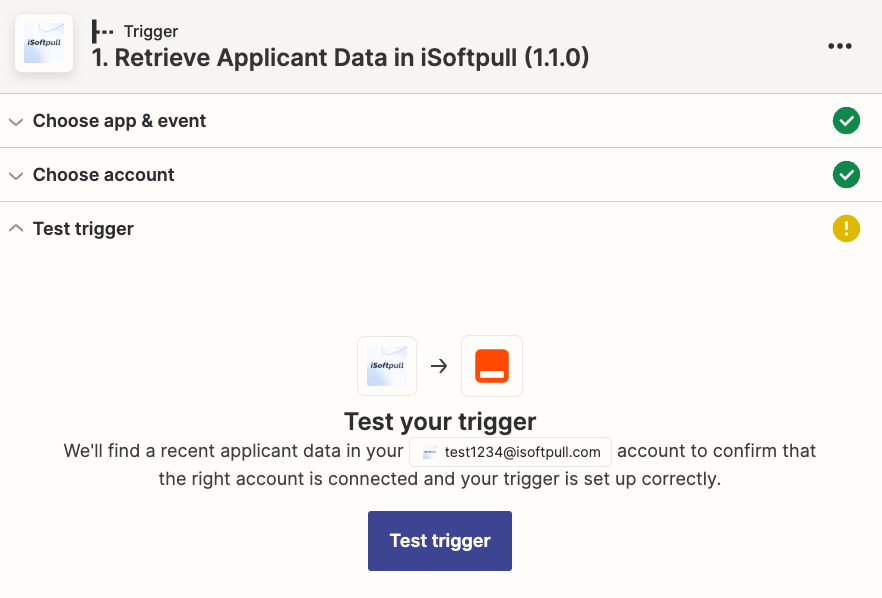 Test Trigger
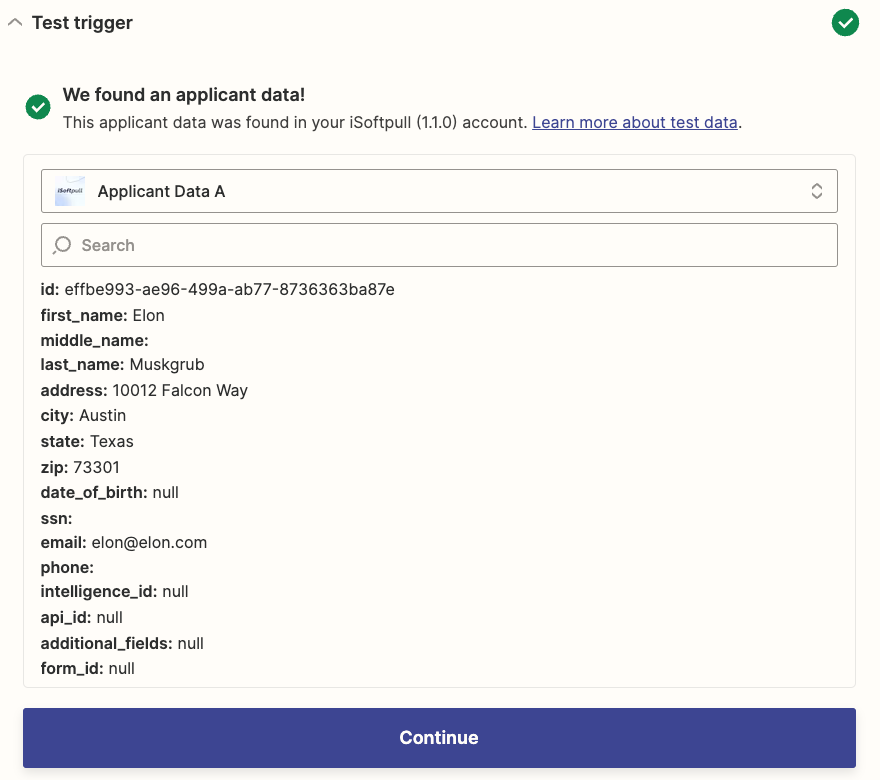 Sample Applicant Results
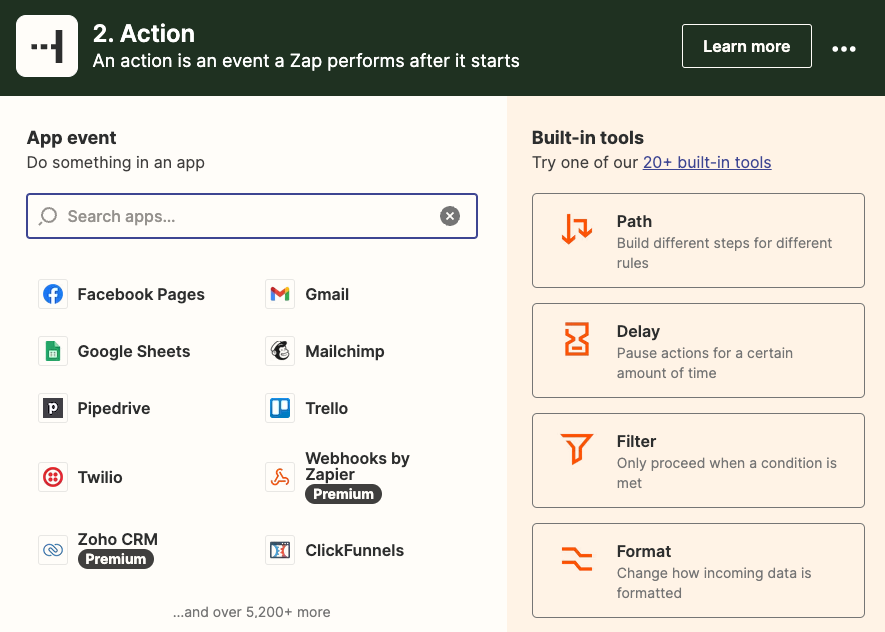
Step 2: Connect your destination source and Action.
 Connect Your Desired App
 Select Trigger (Send Email)
Step 3: Setup Action
 Configure Email
 Email Configuration Continued
Step 4: Test Your Zap!
 Test Action
 Green Check Marks
Step 5: Publish your Zap!
 Publish Zap
Step 1: Configuring iSoftpull
- Select iSoftpull as your Trigger
- Sign in your account using your iSoftpull credentials
- Select Retrieve Applicant Data as your Trigger
- Test your connectivity
Once you have signed in, click the test trigger button to pull in applicant data. If you have no applicant data processed in iSoftpull, we will populate test data for you to check out. If testing works correctly, you should see the information populate in Zapier as shown above.
Step 2: Connect your destination source and Action.
If your Zap is populating test data as shown in step one, you're ready to integrate to your desired software! Simply search for your desired software or select it from the interface. This should bring you to a login screen where you will enter your credentials for that software, just like you did above in step one. For this example I will choose Gmail. Further, in this hypothetical Zap, the desired result I want is for me (the iSoftpull user) to receive an email alert every time a new lead comes in through a webform. As such, I will select Gmail, log in, and select Send Email as my action step.
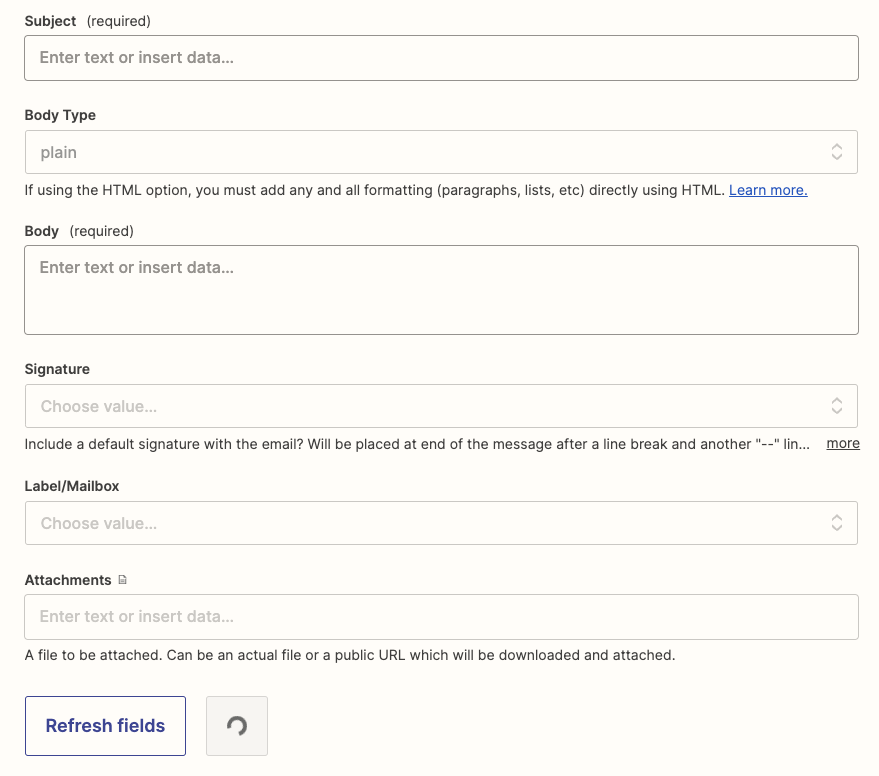
Step 3: Setup Action
The setup action phase tells Gmail what to do once it receives the information from iSoftpull. Here is where we can populate information from iSoftpull into an Email. You may type in your own information, or you may populate information in from iSoftpull.
- To: Wherever you want the email to be sent to (your email address)
- CC/BCC: Anyone else you want to receive the information
- From: Select your Gmail account
- From Name: Your name or your company name
- Reply: Specify a single reply address other than your own (if applicable)
- Subject: NEW SOFT PULL APPLICANT ALERT
- Body Type: Plain
- Body: Here is where I would select information from iSoftpull
- First Name, Last Name
- Address, City, State
- Phone, Email
- Intelligence Result
- Credit Report Link
- Form
- User
- Branch
- UTM information
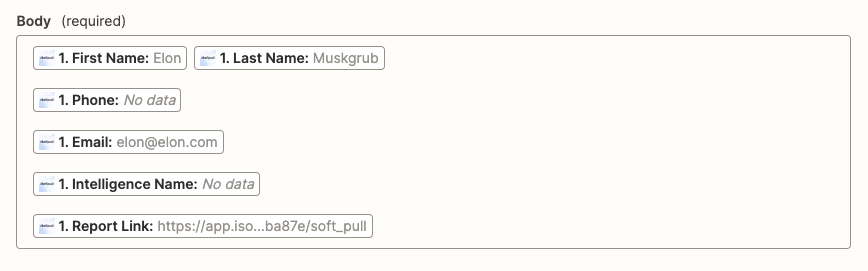
Here is an example of a properly configured body of the message that would populate: First Name, Last Name, Email, Phone, Intelligence, and Report Link.
This will populate information from your client and notify you of who your new leads are, instantly!
Step 4: Test Your Zap!
Click test Action
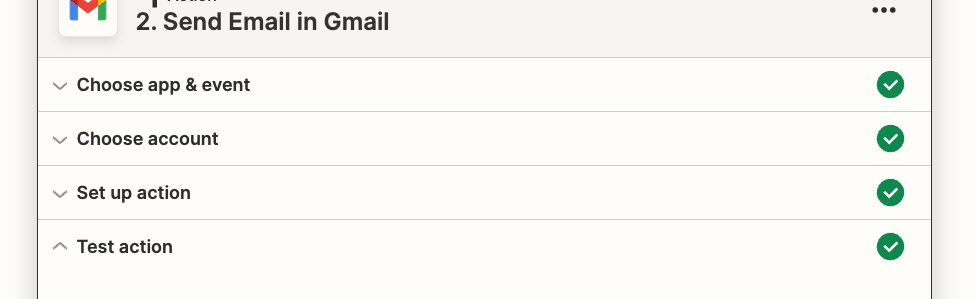
If your Zap is working correctly,
- You should receive a sample email like the one configured above and
- All of the sections in the Gmail section should have a green checkmark as pictured below!
Step 5: Publish your Zap!
To activate your Zap simply click Publish and your integration is complete!
Ready to Get Started? | Need Assistance? Submit a Ticket or Call Us at (760) 579-6171 | Access Your Account |
iSoftpull
(760) 579-6171
2270 Camino Vida Roble, Ste. i
Carlsbad, CA 92011
iSoftpull® 2023 © All rights reserved
Related Articles
Software Updates
We continually publish updates to our software to introduce new features and enhancements to ensure optimal user experience. Keep reading to learn about the latest updates to our software! Experian & Equifax Parser Update Published on April 15, 2026 ...Documentation - Parsing Full Feed Credit Reports API
Full Feed Parsing The full feed will return a json response that will contain different sections of the report. Here is the overall skeleton of the full feed response. The cards below will list out all the data values for each individual section. ...Documentation - iSoftpull APIs - Intelligence Indicator & Credit Report & Score View
Getting Started The iSoftpull API provides access to read credit report data and allows you to run intelligences. To use any of the APIs, you need to create a Key/Token pair from the API Credentials tab. The API Token is highly sensitive information. ...Editing Applicant Status
All iSoftpull license comes with some light CRM functionality, which enable you stage your leads as New, Active, Closed Won and Closed Lost. Inside of the platform you will also be able to filter leads based on status. You can edit the status on a ...Adding Notes to an Applicant
Sometimes it's useful to add notes to an applicant so you can remember certain information about a deal. If you would like to add notes to applicants profile: Step 1: Navigate to their applicant details page Step 2: Click the pencil icon Edit ...